


OVERVIEW
The 'Business Manager' is designed to store all key information relating to the business(es) in the organisation and as a 'quick access' to key resources. This includes:-

Additionally, Businesses hold key information, such as currency, which is used by any/all of the Products and Staff referring to the business.
Currency
The currency selected for this business is used as the default currency for all Products and Employees referring to this business.
Start Month
The Start Month refers to the month of the year that the employment year starts for this business. This is often January, but can be changed as required. It is used by the HR Manager for all employees referring to this business when calculating time off and allowances.
The 'Business Manager' is designed to store all key information relating to the business(es) in the organisation and as a 'quick access' to key resources. This includes:-
- BUSINESS DETAILS - Key information for Name, Business ID, Company ID, Registered Address, Primary Currency, and Employment Year.
- BANK ACCOUNTS - All Business Bank Accounts can be added for quick access to bank details & contacts.
- NOTES - Business notes can be added, such as notes of meetings relating directly to the business.
- DOCUMENTS - Key business documents can be uploaded, such as legal documents, insurance documents and financial documents.
- PRODUCTS - All of the businesses Products will be listed and can be directly navigated to.
- STAFF - All of the businesses Staff will be listed and can be directly navigated to.
Additionally, Businesses hold key information, such as currency, which is used by any/all of the Products and Staff referring to the business.
Currency
The currency selected for this business is used as the default currency for all Products and Employees referring to this business.
Start Month
The Start Month refers to the month of the year that the employment year starts for this business. This is often January, but can be changed as required. It is used by the HR Manager for all employees referring to this business when calculating time off and allowances.
ADDING A BUSINESS 

1. Click the ADD BUSINESS icon

2. Choose a name for the new business and click 'ADD'.
3. The new business will be added to your list of businesses.
NOTE: Only Vizula Multisite customers can add more than one business to their account.
1. Click the ADD BUSINESS icon
2. Choose a name for the new business and click 'ADD'.
3. The new business will be added to your list of businesses.
MANAGING BUSINESSES
Business can be managed separately by clicking on the current business name in the middle of the toolbar. This enables the MANAGE BUSINESSES sub-menu which is used to select, add and delete businesses, access rights permitting.

1. Click the current business name and the MANAGE BUSINESSES sub-menu will be displayed.

A list of your business will be shown in the main body of the sub menu, name on the left and 'Dependent' status on the right - if the business is referenced by any product or employee, it will display 'Yes' in the 'Dependent' column. A business with a dependency cannot be deleted.
Selecting a Business
1. Click on any business to select it to the main page.
Adding a Business
1. Click on the 'Add New Business' icon and the 'Add Business' sub-menu will be displayed.

2. Choose a name for the new business and click 'ADD'.
3. The new business will be added to your list of businesses.
Deleting a Business
1. Click on the 'Enable Delete Mode' icon. and it will change to
  indicating that 'Delete Mode' is enabled.

2. Icons will be displayed in the left hand column of the business in the list as follows:-
3. Click on a business that can be deleted and a confirmation sub-menu will be displayed.
4. Click 'DELETE' and the business will be deleted.
Business can be managed separately by clicking on the current business name in the middle of the toolbar. This enables the MANAGE BUSINESSES sub-menu which is used to select, add and delete businesses, access rights permitting.
1. Click the current business name and the MANAGE BUSINESSES sub-menu will be displayed.
A list of your business will be shown in the main body of the sub menu, name on the left and 'Dependent' status on the right - if the business is referenced by any product or employee, it will display 'Yes' in the 'Dependent' column. A business with a dependency cannot be deleted.
Selecting a Business
1. Click on any business to select it to the main page.
Adding a Business
1. Click on the 'Add New Business' icon
and the 'Add Business' sub-menu will be displayed.2. Choose a name for the new business and click 'ADD'.
3. The new business will be added to your list of businesses.
Deleting a Business
1. Click on the 'Enable Delete Mode' icon.
and it will change to indicating that 'Delete Mode' is enabled.2. Icons will be displayed in the left hand column of the business in the list as follows:-
- A 'Delete' icon indicates that the business can be deleted.
- A 'No Delete' icon
 indicates that the business has dependencies and cannot be deleted.
3. Click on a business that can be deleted and a confirmation sub-menu will be displayed.
4. Click 'DELETE' and the business will be deleted.
DETAILS
TheDETAILS tile holds the following information:-

Editing The Business Details
1. Either click 'Edit Business Details' icon in the toolbar or click the
 DETAILS tile.
2. The 'Business Details' sub-menu will open.

3. Perform the edit and click 'OK'.
The
- NAME - This is the full name of the business.
- BUSINESS ID - The Business ID is a user chosen reference name for the business. This ID is used across Vizula for referencing the business instead of using the full business name.
- COMPANY ID - This is the full registered company ID.
- CURRENCY - This is the currency that this business uses. All employees and products referring to this business will use this currency.
- START MONTH - The Start Month refers to the month of the year that the Employment year starts for this business. This is often January, but can be changed as required.
- ADDRESS - This is the registered address of the business.
Editing The Business Details
1. Either click 'Edit Business Details' icon in the toolbar
or click the 2. The 'Business Details' sub-menu will open.
3. Perform the edit and click 'OK'.
BANK ACCOUNTS
TheBANK ACCOUNTS tile holds all bank accounts for the selected business.

Adding a Bank Account
1. Click the 'Add Bank Account' icon in theBANK ACCOUNTS tile  and the NEW BANK ACCOUNT menu will open.

3. Add the details.
4. Click the OK button.
Viewing / Editing a Bank Account
1. Click on the bank account you wish to view or edit in the bank account list.
2. The 'Edit Bank Account' sub-menu will open.
3. Edit the bank account accordingly.
4. Click the OK button.
Deleting a Bank Account
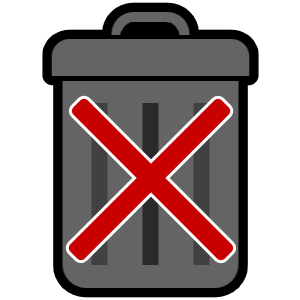
1. Bank Accounts cannot be deleted.
The
Adding a Bank Account
1. Click the 'Add Bank Account' icon in the
and the NEW BANK ACCOUNT menu will open.3. Add the details.
4. Click the OK button.
Viewing / Editing a Bank Account
1. Click on the bank account you wish to view or edit in the bank account list.
2. The 'Edit Bank Account' sub-menu will open.
3. Edit the bank account accordingly.
4. Click the OK button.
Deleting a Bank Account
1. Bank Accounts cannot be deleted.
PRODUCTS
ThePRODUCTS tile shows all the products which currently refer to the selected business.

Navigating to a Product
You can navigate directly to a product by clicking it.
The
Navigating to a Product
You can navigate directly to a product by clicking it.
STAFF
TheSTAFF tile shows all the employees which currently refer to the selected business.

Navigating to an Employee
If you have 'HR Manager' access rights, then you can navigate directly to an employee by clicking it.
The
Navigating to an Employee
If you have 'HR Manager' access rights, then you can navigate directly to an employee by clicking it.
NOTES
TheNOTES tile holds all notes specific to the selected business.

1. Click on the note you wish to view or edit in the notes list.
2. The 'Edit Note' sub-menu will open.

3. Edit the note accordingly.
4. Click the OK button.
Adding a Note
1. Click the AddNote icon
2. The "Edit Note" sub-menu will open.

3. The date will automatically be set to today's date, but you have the opportunity to amend it accordingly.
4. Add a TITLE and NOTE.
5. Click the OK button.
Deleting a Note
1. Click the 'Enable Delete Mode' icon. The Delete icon will turn red and all notes will have a delete icon in the first column, indicating that delete mode is enabled.
2. Click on the note you wish to delete.
3. A confirmation menu will appear asking if you are sure you wish to delete.
4. Click 'DELETE' to delete the note.
5. You can disengage the delete enabled mode at anytime by clicking the 'Disable Delete Mode' icon.
The
1. Click on the note you wish to view or edit in the notes list.
2. The 'Edit Note' sub-menu will open.
3. Edit the note accordingly.
4. Click the OK button.
Adding a Note
1. Click the AddNote icon
2. The "Edit Note" sub-menu will open.
3. The date will automatically be set to today's date, but you have the opportunity to amend it accordingly.
4. Add a TITLE and NOTE.
5. Click the OK button.
Deleting a Note
1. Click the 'Enable Delete Mode' icon
. The Delete icon will turn red and all notes will have a delete icon in the first column, indicating that delete mode is enabled.2. Click on the note you wish to delete.
3. A confirmation menu will appear asking if you are sure you wish to delete.
4. Click 'DELETE' to delete the note.
5. You can disengage the delete enabled mode at anytime by clicking the 'Disable Delete Mode' icon.
DOCUMENTS
TheDOCUMENTS tile holds all documents specific to the selected business. Key employee documents can be uploaded, such as employment contracts, agreements, bonus targets, written warnings etc.

1. Open the documents folder by clicking the folder icon.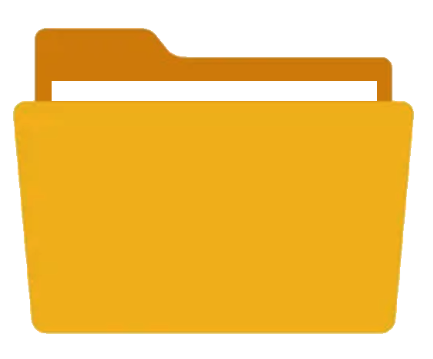

Uploading a Document
1. Click the 'Add Document' icon
2. The 'System File Dialog' will open.
3. Select a file or files to upload and click 'Open'.
4. The selected file(s) will be uploaded to Vizula and will appear in the Documents Folder.
Downloading a Document
1. Click any file to download it to your device.
Deleting Documents
1. Click the 'Enable Delete Mode' icon The icon will turn red and you can now select files to be deleted by clicking them.

2. A file selected for deletion will show a trash icon in the top right corner of the file icon. You may select as many file for deleting as you wish.
3. A large trash icon will appear in the document folder toolbar indicating how many files will be deleted.

4. Click the large trash icon 'Delete Documents' to delete the selected files.
5. A confirmation sub-menu will be displayed asking for confirmation of deleting the files(s).
6. Click 'DELETE' to remove the file(s).
(c) 2023 Vizula Limited - v 0.970 - 01082023:031013The
1. Open the documents folder by clicking the folder icon.
Uploading a Document
1. Click the 'Add Document' icon
2. The 'System File Dialog' will open.
3. Select a file or files to upload and click 'Open'.
4. The selected file(s) will be uploaded to Vizula and will appear in the Documents Folder.
Downloading a Document
1. Click any file to download it to your device.
Deleting Documents
1. Click the 'Enable Delete Mode' icon
The icon will turn red and you can now select files to be deleted by clicking them.2. A file selected for deletion will show a trash icon in the top right corner of the file icon. You may select as many file for deleting as you wish.
3. A large trash icon will appear in the document folder toolbar indicating how many files will be deleted.
4. Click the large trash icon 'Delete Documents' to delete the selected files.
5. A confirmation sub-menu will be displayed asking for confirmation of deleting the files(s).
6. Click 'DELETE' to remove the file(s).